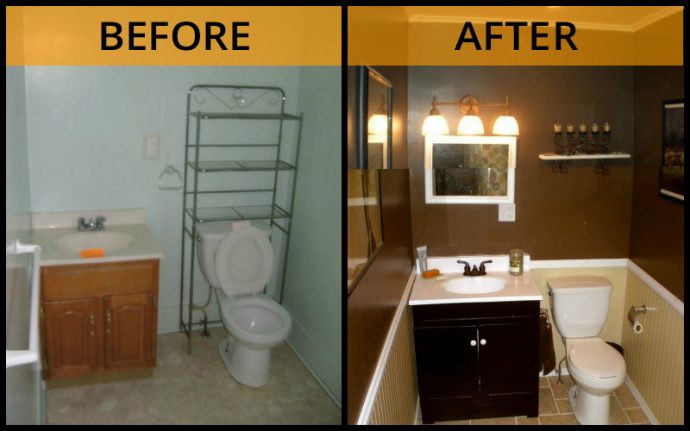
Home renovations and projects do not have to be difficult or extraordinarily expensive. Whether you are looking to customize your home or simply looking to save a few dollars, we are confident that you are going to want a polished finished project that reflects your dedication and hard work. That is why Dickens Mitchener has compiled a short list of Do It Yourself projects and home renovations that you didn’t know that you are perfectly capable of doing. Without further ado, let us explore these ideas together.
image source: here
Hardwood Flooring
Hardwood floors are incredibly beautiful, detailed, and easy to clean up. Why not make your own?
- First, before purchasing any materials, draw out an outline for the space you would like covered. Make sure to be as specific as possible about measurements.
- Once you have finished the outline, draw up the pattern that you would like to have laid down. You can be as simple as alternating rows of long boards, simple squares, or detailed with designs depending on your skill level and desire.
- Pull up the flooring that you currently have and scrape any old material away from it.
- Purchase the wood, cutting devices, adhesive, and sealant that you will need to complete your project.
- Cut all of the pieces you will need for your floor and stain them if necessary.
- Lay a thin layer of adhesive and start laying your designs out.
- Once you have finished your flooring, apply a generous sealant to lock in your beautiful new design.
Custom Cabinets
Remodeling the kitchen and bathrooms in homes is very popular. To make your remodel complete, consider making your own custom cabinets.
- Measure out the size, shape, and dimensions of the area that you would like to install cabinets in.
- Purchase the wood, stain, sealant, and mounting hardware necessary to complete your project.
- Cut each of your pieces and assemble the general frame for the base of the cabinets. This is the overall rectangle or square that will later be divided up into smaller cupboards.
- Glue the base of the cabinets together and reinforce with screws where necessary. You may also mount the cabinets to the wall now with the mounting hardware that your purchased.
- Cut, color, and etch the design that you would like to appear on your cabinet doors. You can use a simple design or a complex design. Make sure to sand all sharp edges away in this process.
- Attach hinges on both the base and doors of your cabinets and then attach the doors to the cabinets.
- You may finish this project with a simple paint or sealant.
Sea Shell Mirror
Decorating the mirrors in your home will bring your theme or themes to life. The steps below are detailed for a beach theme.
- Purchase a mirror with a wide border that you would like to display in your home.
- Purchase a hot glue gun, glue sticks, rope, sand, and sea shells.
- Lay your mirror flat on the ground and start by gluing rope along the perimeter of your mirror. Once you have completed your first outline, continue gluing the rope in a new line just inside of the line you have finished.
- Once you have finished your rope border, line your sea shells up in the pattern that you would like them to remain in and glue them down.
- If you haven’t already, line your workspace surface with newspaper, a tarp, or another protective surface.
- Line open spaces on your mirror with hot glue and fill them in with sand for your finished, beachy look.
Brick Facade
Are you infatuated with the rugged brick look of New York lofts? You’ll be able to turn any room in your home into a stylish brick paradise in no time in just a few steps.
- Clean your drywall wall exceptionally well. You will be gluing your bricks directly to this wall.
- Purchase the bricks and adhesive from your local hardware store in the color, size, and shapes that suit your personal interests.
- Measure out perfectly level lines from one end of the wall to the other. You will be using these lines to ensure that your bricks are even with each new layer.
- Paint your wall in a thin layer of the adhesive that you purchased.
- Paint the back of each brick with a heavy coat of your adhesive and then stick your brick to the wall.
Cautions
We know how exciting it can be to plan a promising DIY project or home renovation of your very own, but be aware that there may be a few cautions that you have to take. For example, you should refrain from building onto your home unless you have the appropriate permit or permits to do so. You should also stay away from extensive electrical, plumbing, or general construction unless you have experience in that line of work and the certifications and permits to support you. If you are unsure of whether or not your projects require certifications or permits, contact Dickens Mitchener and we will point you in the right direction.
Jessica Kane is a professional blogger who writes for Scaffold Store the favorite and trusted scaffold supplier of the largest contractors.


